

Happy Thursday y’all! It’s the Creative Craft Hop today and I am sharing a re-cycled patriotic sign that is fun, inexpensive and easy to make. Sound like your kind of sign? Then keep reading!


A great big shout out to Sara of Birdz of a Feather for wrangling all of the talented crafters together for this fun hop! She does an amazing job at hosting!
If you hopped here from Anne’s at Apple Street Cottage, WELCOME! I’m so glad you are here!
Now let’s get started!


I found these old blind slats when we cleaned out the garage recently.
First thought was to toss them.
For some reason I decided to keep them and I am so glad that I did!


Step 1
Decide how big to make your sign.
I laid the slats out and once I figure out how big to make my sign I simply marked how long I wanted them with a pencil.


The slats were early cut with scissors!

Step 2
Paint the slats.
Again, after deciding how big I wanted the blue part of my sign to be, I lightly marked it with a pencil.
At this point you can tape it off if you don’t feel comfortable fee hand painting this area.

Step 3
Once the sign part of the project is painted, now it’s time to paint the decorations.
I had these stars left over from another project you can pick them up here.
Paint the stars white and set aside to dry.

Next it’s time to paint the wooden beads.
I like to use this super easy method to paint them.
Wearing gloves, place about a teaspoon of paint in the palm of your hand.
Add a few beads, then rub your hands together.
In seconds your beads are completely covered in paint!

Now I place them on BBQ skewers and let them dry.
Step 4
Now let’s put the sign together!
Flip your slats over, back side up, making sure the ends line up.
I cut three extra slats that were about 2 1/2 ” shorter than the height of the sign.
Simply glue them to the back of the sign.

Step 5
Decorate your sign!
Flip your sign over once the glue has dried.
Glue the stars that you painted onto the blue area.
Next, glue on a simple patriotic bow.

Step 6
Add the wooden bead hanger to the sign.
String your wooden beads onto some twine in the pattern that you choose.
I used the twine that the beads came on.
A simple red, white and blue pattern is what I used here.
Once the beads are on the twine, flip our sign over and attach the string to the back of the sign.

This re-cycled patriotic craft was fun to make and super easy.
The hardest part was waiting for the paint to dry!
Please join me in hopping over to Terrie’s to see what wonderful craft she has for us this month!
I’m listing all of the participants below so that you can visit them to for some fun craft inspiration.
DIY Patriotic Star Door Hanger
Seaside Serenity: Crafting Your Own Coastal Farmhouse Lantern!
Dollar Tree Stencil Craft on Canvas
Blah to Blue-tiful Birdie Upcycle for the Garden
How to Make a DIY Patriotic Pillow
Until next time……
Tammy
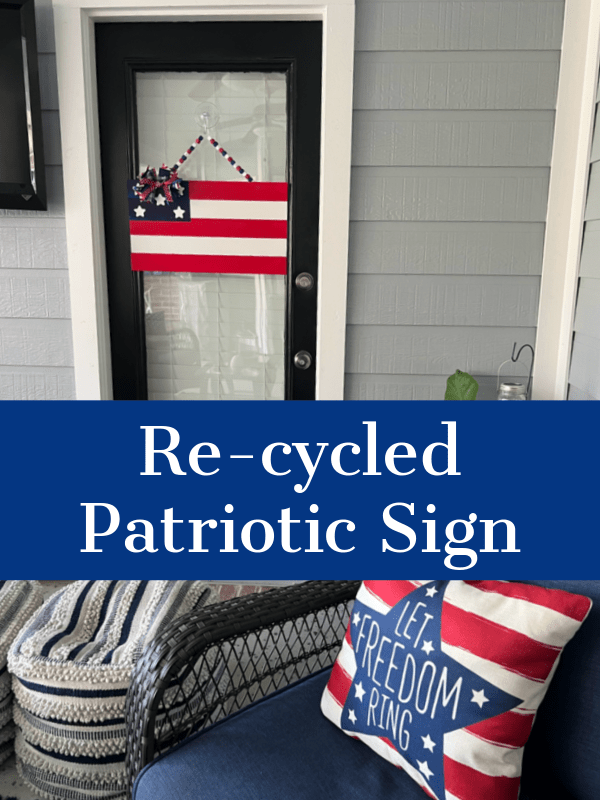
Pin It For Inspiration!