


Before I get started I’d like to thank Donna from Modern On Monticello for hosting us this month. She always does such a great job putting this hop together. Be sure and stop by her blog and thank her!
Also, if you are coming her from Cecelia’s My Thrift Store Addiction – Welcome!

Supplies
1 – Pumpkin jar from the Dollar Tree
Drill and Drill bits
Soap pump ( I used one from an old soap dispenser)
Sand Paper
Hot Glue
Raffia( optional)

I just want to say that this is not something that I thought of.
However, I’ve wanted to try this for some time and thought if I wanted to make one maybe you did too.
My question was – Is it really as easy to make as they say?
Yes! It is!
Step 1 – Remove lid from jar.

Step 1
Find the center of the jar lid and mark it.

Step 2
This part is optional but I found it to be very helpful.
I had an old round piece of wood that I placed the lid on top of before drilling a hole.
It kept the lid from moving and my drill bit from going into the table top.

Step 3
Using a drill bit slightly larger than the straw part of the soap pump, drill a hole.
Once you have this completed, sand the rough, raw edges.
Be careful, the lid may be sharp where you drilled the hole.

Step 4
Next, insert the soap pump into the hole and place hot glue or E6000 around the edge of the hole.
Push the soap pump as far as you can into the hole, until the base of the pump touches the lid.
Let completely dry.
Step 5
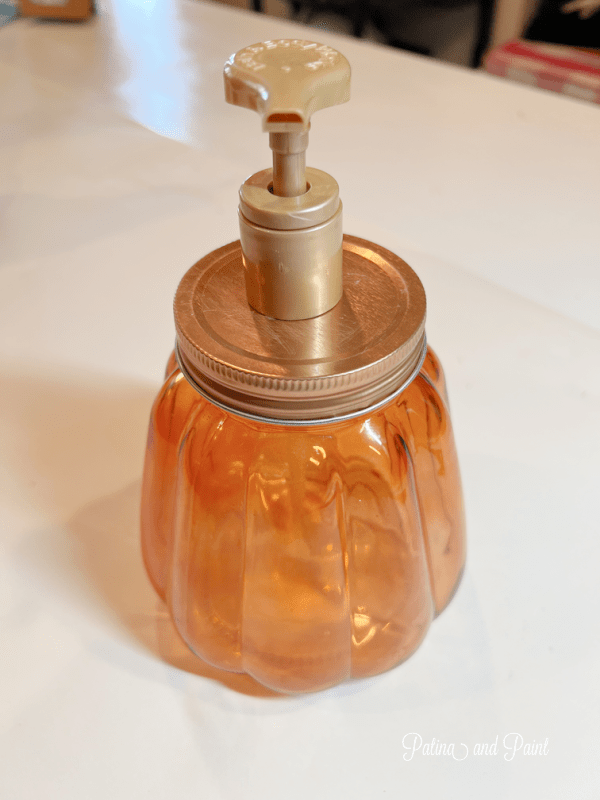
Pour your favorite soap into the jar.
Once the glue has dried, put the lid onto the jar and you have the cutest little pumpkin soap dispenser ever!
I tied some raffia onto the base of the pump for a little fall fun.
Now, I know that this is for Fall but can’t you just see fun Jack-o-lanern faces painted onto the front of these?
Or maybe even some vinyl lettering “Give Thanks” for Thanksgiving?
The possibilities are endless.

Now please join me in visiting Gail at Purple Hues and Me to see what craft she has for us this month.
Also, don’t forget to visit all the crafters – I’ll put their links below so that you can easily find them!
Until next time…
Tammy

Pin It For Inspiration!