Summer Wreath
Okay, so it’s not officially summer yet, but a girl’s gotta be prepared. Right? It’s time to get new flip flops and swimsuits. Dust off those shorts. Get out the big glass gallon pickle jar to make sweet sun tea. (If your not from the south and have no clue, it’s how we brew our tea. Outside, in the sun.) Time to spruce up the yard and plant new flowers.
While I was sprucing up the yard, I realized two things: my front door needs a new coat of paint and I need a new fun wreath to welcome summer.
So what does a girl do when in search of the perfect wreath? NO! Not go shopping. I went Pinning, of course. I saw this pin from Lisa at Wine and Glue. Such a cute idea I had to try it. I had found my new summer wreath.
I have lots of pictures to share with you, so grab a cup of coffee, sit back and enjoy!
If you want to make one too, here is a list of what you need.
different patterned papers, cut 6″ X 6″
glue stick
scissors or paper cutter
paper brads
12″ styrofoam wreath
Ribbon
straight pins
The first thing you want to do is cut your 6″ X 6″ papers. You are going to need 12 pinwheels, so you need to cut 24 squares of paper. Then, using a glue stick, glue them together.
Ready to create your pinwheel? Fold your paper opposite corner to corner, creating a triangle. Then unfold it and repeat the process on the opposite corners. ( Mental note: man, I really need to moistures my hands more!)
When done, it will look like this.
Cut on folded lines stopping about 1/2″ from the center of each line. This will give you 4 “attached” triangles.
Prepunch small holes in the middle of the pinwheel and…
on each of the left hand corners of each cut triangle. Note: make sure that you punch the hole in the same corner of each attached triangle. Left or right really doesn’t matter, just as long they are all the same.
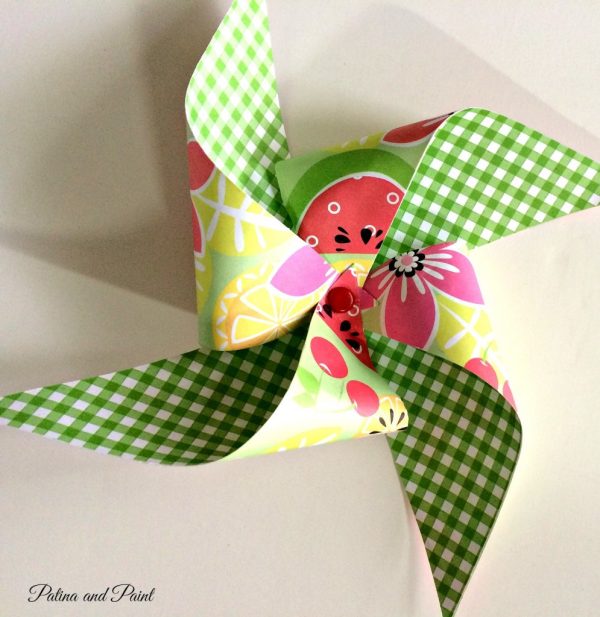
Using your brad – push it into the left corner hole of each triangle, then through the center hole. Close the prongs of the brad and you have created your pinwheel. If the brad isn’t fun enough for you, you could glue on a button to the top of the brad like Lisa did.( Actually, Lisa used a thumbtack instead of a brad, then just pushed the pinwheel into the wreath form. This might be easier for you.)
When you are done, you will have 12 pinwheels. See all of my lovely pinwheels? Lurve them!!!
Time to attach the pinwheels to the wreath. Now Lisa didn’t cover her wreath, but I didn’t want to take the chance that you could see it. OCD much? Oh, yeah! I covered the entire wreath by wrapping it with ribbon.. I wanted to use the wide ribbon you see here but it was too wide and bunched up like a pair of granny panties! Uh, no.
So I went with an inch wide ribbon and wrapped and wrapped and wrapped… Using a straight pin to secure the ribbon. That way I can reuse the ribbon or if I want to change up the wreath later,I can.
To make the loop to hang my wreath from I used a 2″ wide yellow, trellis patterned ribbon. Tie the ribbon to the wreath. Leaving a couple of inches slack, tie another knot closer to the end. I like making the hanger this way, so that I can adjust how high or low the wreath needs to be – gotta be able to use that peep hole!
Next, attach each pinwheel to the wreath with a straight pin – be sure to hide the pin behind the folded part of the triangle.
This is the finished product. I really, really love how the bright colors pop against my black front door! It just screams summer.
This truly was one of the easiest wreaths I have ever made. The “hardest” part was glueing the two papers together. Not. Hard. At. All. In fact, this would be a great summer project for kids!
Woo Hoo! My summer wreath is done. Now if I just had a little elf that would just paint the front door….
Until next time….
Tammy


Doesn’t your little elfs name start with a K?!? Love it, wish I had the time to make one!