Christmas Surprise Box Challenge
Who doesn’t love a good surprise? I know I do. So when Terrie from Decorate And More With Tip asked a few of us if we wanted to participate in a Christmas Surprise Box Challenge I said yes! This is the surprise box that I received. It included 2 ornaments, wooden santa cutouts, wooden stickers and a mop head! I took one look at the box and immediately knew I wanted to make a Santa garland.
What’s a Surprise Box Challenge?
A group of bloggers drew names and exchanged addresses.
We decided to spend no more than $10 on items at the Dollar Tree.
They all had to be Christmas themed.
With one twist: we had to include one item that would be a “challenge” to decorate with.
We then mailed our surprise boxes that we put together to the person that we drew in the drawing of names.
Once we received our box, we had to make something out of everything in the box!
Glitter Ornament
When I got my box from Jodi at The House House, I couldn’t wait to get started.
First, I made a red glitter ornament.
These ar super easy to make.
Simply pour mop and glow into the ornament.
Rotate until the inside of the ornament is covered in the mop n glow, pour out the excess.
Pour glitter into the ornament, rotating until it is covered in glitter.
Wooden Santas
- Paint the Santas red.
- I wanted my Santas to say “Believe” so I hand drew on the letters.
- Paint the letters.
- Add a coat of glitter for some sparkle.
Once the paint and glitter had dried, I tied the Santas to a long length of twine.
Wooden Stickers
Next, paint the wooden stickers.
I just love these!
The gold stars were already gold, however the snowflakes and trees were unpainted.
I painted the snowflakes white and of course add some glitter.
Then it was time to paint the trees green with ornaments for embellishments!
Challenge Item
My challenge Item was a mop head.
I cut several strings from the mop head getting as close to the top as possible.
Once that was done, I tied twine around the middle of the strings, then folded it in half.
Be sure and leave several inches of twine at the top so that you can use it to tie onto the garland later.
Using another 10 – 12″ piece of twine, wrap it around the tassel one time about 1 inch from the top.
Cut 3 six inch lengths of ribbon.
Find the center of the ribbon and lay it across the twine. ( Do this for all three pieces of ribbon)
Wrap the twine around the ribbon once, then fold the top piece of ribbon over the twine and wrap several times.
Knot and cut off loose ends.
You have made a cute tassel.
Now it’s time to put it all together.
I tied the ornaments to each end of my garland.
Then tied on the tassel.
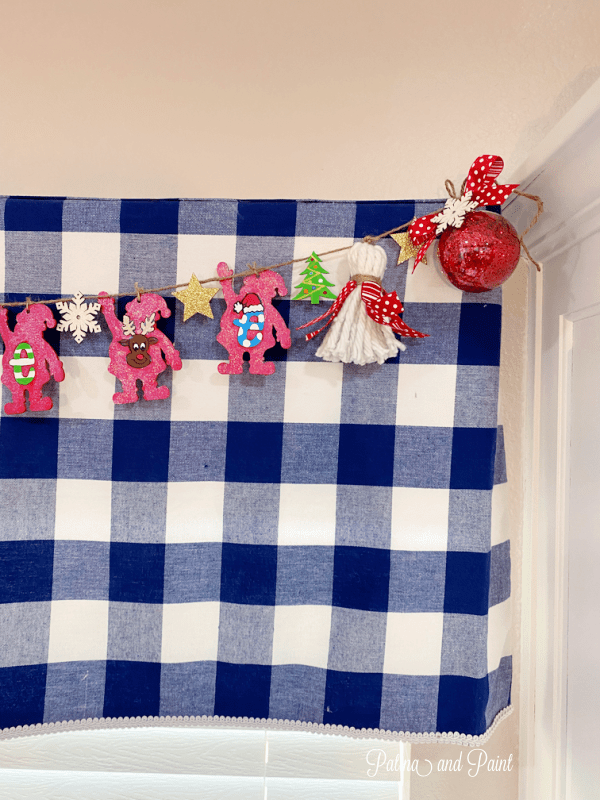
Once this was done I hung my garland on my window valance, adjusting the decorations to be evenly spaced.
Then I hot glued the wooden stickers between each decoration.
My Santa garland was finished!
And I couldn’t be happier with it!
Now I hope that you will join me in visiting all the other participants to see what they did for their Christmas surprise box challenge!
Until next time…


 Sweet Southern Grace
 Patina and Paint
 Stilettos and Shiplap
Wow! I am blown away by your creativity! Love how you used the mop. Perfect. Great job, Tammy.
Thanks Jodi! I have some of the mop left over – I’ve been thinking of other ways to use it… lol!
Genius use of the mop head! It looks so great!!
Thanks Mariah. Have a wonderful Holiday!
Tammy, I love how you work and think. This project turned out so darn cute. Love the garland. I have a mop head in my craft supplies, I need to make some of those tassels, super cute. Hope you have a happy and safe holiday!
Thanks Terrie! I love these challenges – they truly do make you think outside of the box. Merry Christmas!
Tammy, this is so fabulous! You are a queen of craft!👸
Thanks Rita! These surprise boxes are truly a challenge!