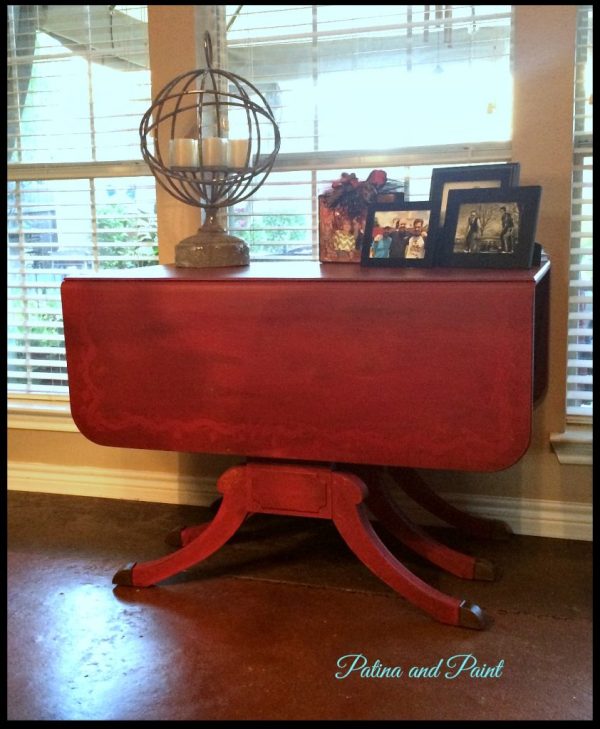
Dining Room Table in the Living Room
 Year’s ago I found this great looking dining room table by the road side. It was in great shape except for one thing. This huge burn hole smack dab in the middle of it! I still saw potential and brought it home much to my family’s dismay! After tons of wood putty, sanding and a few chosen words, the table was brought back to life. I faux painted it to look like wood and painted a fancy gold vine around the top. The thing is I don’t use it as a dining room table. It is a dining room table in the living room! It has had many lives. Sofa table, side table, and Nic-Nac-Patty-crap catch all!
Here is what it has looked like for the last 12 – 15 years. It was time for a change!
For years I have stalked Miss Mustard Seed. I love her web site and if you haven’t visited it, you need to. The girls got mad skills! The only thing that has kept me from trying her Milk Paint was that you had to mix up the paint yourself. I still have really bad flash backs to art class in college of mixing milk and chalk paint myself. Let’s just say I am not the neatest person and move on! But I have matured, right? If I can pick up heavy furniture out of a ditch, haul it home, clean it up, and make it look beautiful I should be able to mix paint right?
I bought MMMP in tricycle. Yep, I went red! I quickly red the brochure and even watched a youtube tutorial on how to use it and started mixing. I am not gonna lie – I still make a mess. A really big red mess. I put it in a clear cup just like suggested and used a popsicle stick to mix. It was just like I remembered – It takes a good 5 minutes of mixing to get it mixed well. Once I got it all mixed I just applied it to the table in nice even strokes. I painted one coat, let it dry 30 minutes and then painted my second. And then sat back and let the magic happen – I waited for it to get “chippy”!
See MMSMP does a couple of things chalk paint doesn’t. It chips off in some places and it has an uneven “old” finish to it. This is great if you want a really old, distressed looking piece with none of the work to get it!
I let it sit over night and here is what I got the next morning! Pretty cool!
I love how it looks like it has been out in the elements for years!!!
MMS says to take a small putty knife ( nope – I couldn’t find a smaller one!) and gently remove the flaking before applying your finished top coat.
Since I was doing all things new in the paint department, I went with the MMS Hemp oil instead of wax. Hemp oil has been around forever and is an excellent, durable protective finish. Note: if you use hemp oil you will need to re-apply yearly! As you can see, the painted piece starts off with a “chalky” look and as you apply the oil it gives it a slightly darker more weathered look.
Here is the finished piece. It is uneven in finish, looks like it has paint peeling, is very “chippy” in some places and very smooth in others – it looks like a table that is 100 years old and has been painted several times. I love it!
I am not sure that I would use MMSMP all of the time just because I am a total hot mess when mixing it but, I would use it for the occasional piece just to change things up or when I want an elegant rustic piece. Other than my mixing issues, which I am certain the average person wouldn’t have to that magnitude!, it was really easy and fast to apply! I give it an A and a beginners level score.
until next time…..
Tammy


