Ikea Duktig Children’s Kitchen Makeover

For those of you who have been following along for a few years you know that Beep is my niece’s little girl. I can’t believe that she recently turned three! For her gift, my sisters and I decided to do an Ikea Duktig children’s kitchen makeover.

Full disclosure, it comes in an average size box that weighs a hundred pounds.
Slight exaggeration, but I suggest taking someone with muscles to help you carry it home.
Also, just so you know, it takes hours to put together!
NOT an exaggeration.
This is how it looks straight from the store.
Cute, but it can be so much better!

Step 1:
The first thing I did was decide how I was going to give it a tiny facelift.

Step 2:
Then I separated all of the many parts that needed to be painted.

All of the hardware was painted gold.

The countertop received a few good coats of white spray paint.

Step 3:
Once it was dry, I painted gray veins that resembled marble.

Step 4:
When all of the painting was done, I spent two evenings painstakingly putting it together.
Anybody who has ever put together anything from Ikea can relate.
It was already looking much better!

Step 5:
After putting it together, I realized that I could have painted more pieces white.
Just to give it a little more pizzaz.
To go with the kitchen I had made an apron, chefs hat, and oven mitt.
I decided to use the scrap material and mod podge it to the back of the cubbies.
The material gave the kitchen some much needed color!
However, it still needed something.
A backsplash!

Step 6:
The hubs cut out a thin board that fit the entire upper back half of the kitchen.
My first thought was how cute it would be to put peel and stick tiles on it.
After pricing the peel and stick tiles I realized two things.
- It was pricey for our budget.
- The scale of the tile was all wrong.
Instead, I went to plan B and painted the wooden board dark gray.
Then cut out heavy white poster board pieces to look like subway tile, then glued them to the board.
Once they were dried, I painted over the entire board with a clear gloss sealer which gave it the look of tile!

Step 7:
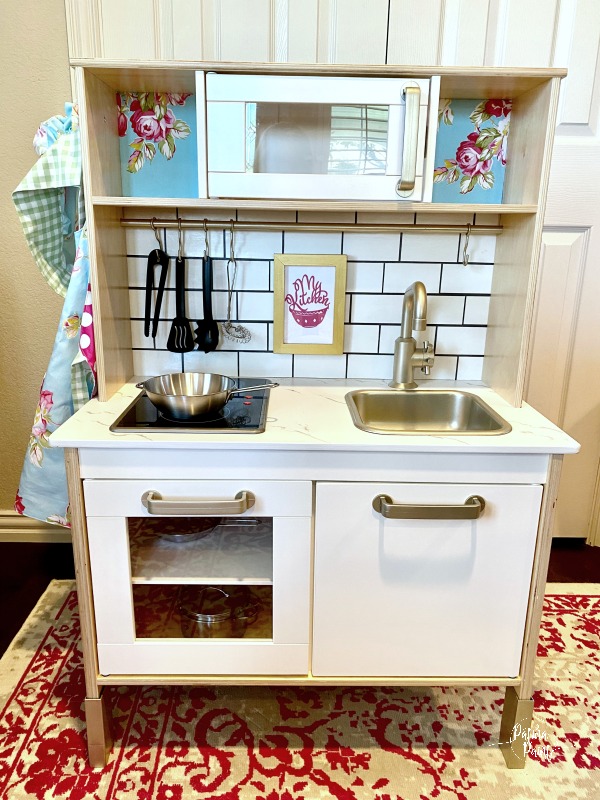
Now that the kitchen was all put together, it was time to add the jewelry!
This painted wooden knob was a perfect “hook” for Beep’s apron and chef hat.

A painted small 4 x 6 frame with vinyl kitchen art made the cutest little kitchen sign.

This next addition just may be my favorite!
Two coats of chalk board paint and a cut vinyl sticker made the perfect menu board.
The hubs made a chalk tray that rests on the countertop at the bottom of the sign.
A girls gotta have a place to put her chalk and eraser!
We also added a tiny little hook to the lower left side to hold Beep’s oven mitts.
Sadly, I didn’t get a picture of either.
I was so excited to be done that apparently I lost my mind…

While we were at Ikea we also picked up the utensil set and the pots and pans.
I think both of which were under $10.00.
They are so well made and stinking’ cute too!
I can honestly say that I love our Ikea Duktig children’s kitchen makeover.
Better yet, so did Beep!
Until next time…
You are amazing!
Thank you Karen!
That really is so so cute, she is so lucky to have you in her life
Awww… you are too sweet Siana! We are the lucky ones to have her, she’s just so fun!