Painting Pumpkins
Painting pumpkins to match your decor is probably the easiest, cheapest way to change the look of fall decor in a room.
This fall is all about bold, muted colors.
Lots of mustards, oranges, golds, greens and blues abound everywhere you look.
While mustard isn’t part of my color scheme in a major way this year, the rest of the colors are.
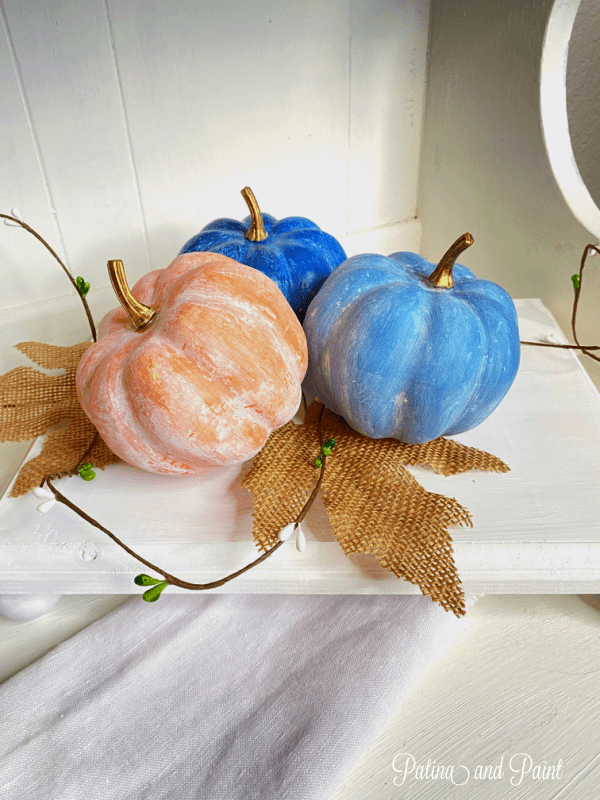
Today I’m sharing how to take a pumpkin and give it that beautiful muted patina.
The best part?
It’s super inexpensive and easy!
I found these sweet little baby boos at my local Dollar Tree.
There were only three left so I snatched them up.
Here are the supplies you will need to paint your pumpkins:
Pumpkins
Acrylic craft paint
Paint brushes
Paper towels
Step 1
Paint your pumpkins.
Give your pumpkin a primer coat of white.
No need to do more than one coat, make sure you get the paint as smooth as possible.
Once the primer coat has dried paint the pumpkins the color you want them.
I chose to do a navy, steel blue and a spicy orange.
tip: if you can remove your pumpkin stems do so before painting. Mine could not be removed without tearing up the pumpkin.
Step 2
Once you have the primer and base coats on your pumpkins, it’s time to antique them.
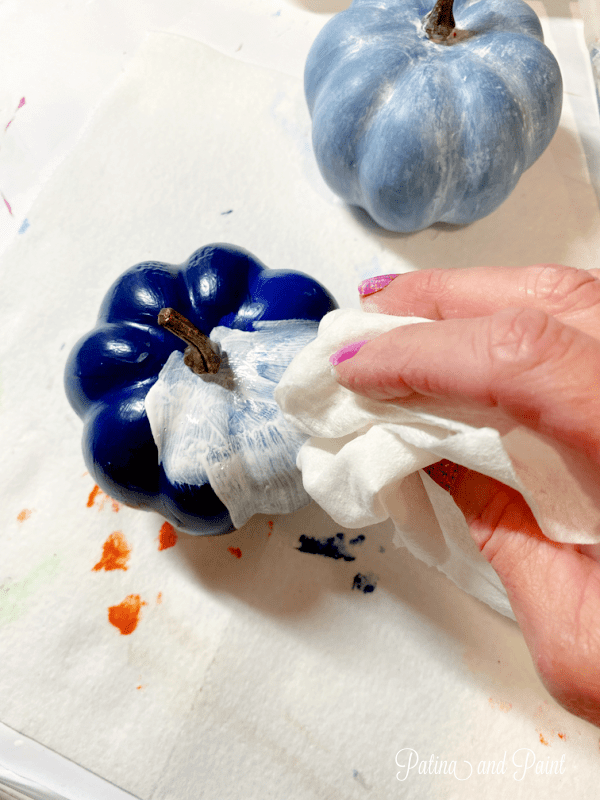
Using your white paint, paint a section or two on the pumpkin at one time.
Using a paper towel or disposable rag, wipe of the white paint leaving behind a white film.
Don’t paint the whole pumpkin as your paint will dry out before you can get all of it wiped off.
This will leave dry lines and an uneven finish.
Make sure to leave more paint in the creases and crevices.
If you happen to have spots that you wiped too much paint off, no worries.
Simply dry brush more paint on the area.
Dry brushing allows you to add as little or as much paint as you want, so it’s perfect to go back and fill in bare spots.
Step 3
Touch up the pumpkin stems with paint.
You may or may not, depending on how neat you are, have to touch up the stems of the pumpkin.
Since mine were brown with gold anitquing, I simply used a gold paint to touch up the stems.
You are finished painting your pumpkins!
Painting pumpkins could not be easier.
If you choose to, you could give them a flat protective coating.
However, I felt that since mine were not going to be handled at all that I could skip that step.
See just how easy painting pumpkins can be?
I can’t wait to share with you how they look on my breakfast room hutch!
Be sure to check in on Friday for our Decorate With Us fall series hutch and table reveal!
Also, Corine and Terrie will also be sharing their projects this week that they are doing for their Kitchen, so don’t miss those!
You can see those here:
Corine – Junk To Gems
Terrie – Decorate And More With Tip
Until next time….


They turned out so pretty. I always see the gaudy ones at the dollar store. I love how you muted the colors too. Very pretty!
Thanks Corine! I am loving the muted colors this year.
Thanks Corine! I’m really enjoying the muted fall colors this year.
I just love your painting technique. I am loving the white antiquing vs the dark antiquing look. Thanks for sharing.
I love the way the white anitquing looks old and muted… a fun look for fall.