Reupholstering Big Red
To take a page out of Scarlet O’Hara’s book, As God as my witness I will NEVER reupholster a chair of this difficulty again! For reals! EVER!!!!
My sweet baby sister called me and asked if it would be worth $20.00 to buy this chair. “OF Course!” Would we be able to reupholster it or slip cover it? “No slipcover… the wood is too pretty! Let’s reupholster it!” Was I out of my mind? I have no chair upholstery training and I have certainly never tackled anything of this degree of difficulty, but I had plenty of enthusiasm, imagination and was ready to go.
And then it literally took me more than a month to take the old crusty red fabric off of the chair. Who ever had upholstered it before apparently knew how to make it LOOK good, but that was all. The front arm panels were attached with four inch nails, the “wings” on the side of the chair had at one point been broken off and had four inch bolts – not screws- put into it in an attempt to reattach it. Basically, the only thing holding this chair together was the fabric. And the upholstery foam and batting? Ewww! Over time it had been recovered several times and had modern foam and batting added to the existing horsehair. It was a nightmare! A big, dirty, hot mess. I am not totally sure – but if it had been mine I might have added some kerosene and a match at this point.
I put the hubs to work rebuilding the arms and then I started in on rebuilding the chair from the seat out.
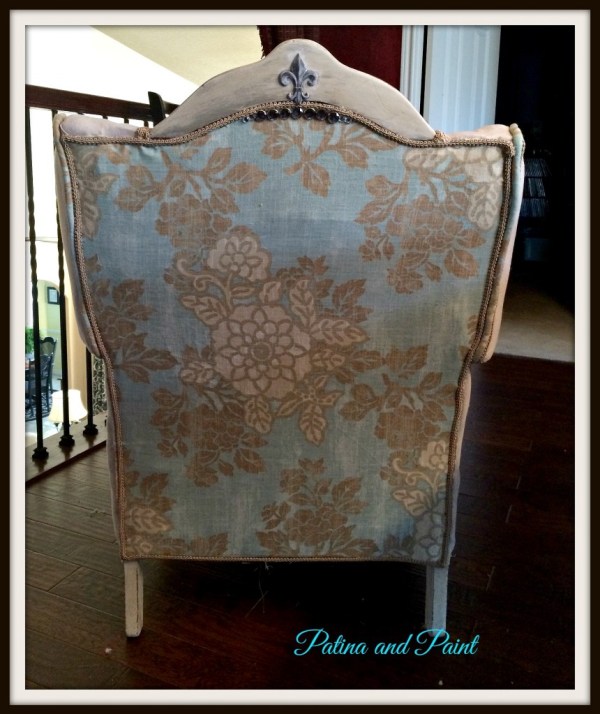
Here is the old/new chair. Not perfect by any stretch of the imagination!!! A little lumpy, but since it is in a shabby chic style I think that it works out just fine. It is pretty comfy too. I painted the wood in AS Pure White and Gray Linen followed by dark wax. Love it!
We decided to use two different fabrics, a bleached drop cloth on the main body and then this beautiful floral on the back and the seat.
As with all shabby chic you have to have a little bling so we added this really cool rhinestone upholstery tacks. All business in the front and a party in the back! I like little surprises like that.
I am so happy to say I am DONE! I am sure that my sister will be too. I do have some tips for those of you who are crazy enough to try this.
1. WEAR A MASK! I cannot stress this enough. Even my dog Sadie had a sneezing fit when she walked by this thing. Who knows where a piece has been or what was done to it!
2. Use the fabric you remove from the chair as your pattern for your new upholstery fabric. This saves a lot of time!
3. Take lots of pictures as you take it apart. You may think you will remember how it looked and went together as you are taking it apart, but I can tell you now that you won’t!
4. Before undertaking this project have a good psych eval! lol! Seriously, think long and hard before you leap. This chair took longer to take apart than it did putting it back together – a first for me, but it was way more labor intensive than even I would have expected!
That’s all of the words of wisdom I have for now…
Until next time….


