Watermelon Summer Sign

Happy third Thursday of the month to you! Today is the Creative Craft hop and I am so excited to be sharing a fun – and easy – Watermelon Summer sign with you!

A great big thanks to Sara from Birdz of A Feather for hosting this fun hop.
She always does a fabulous job of keeping us all put together!
If you are coming here from Marie’s, I’m so excited to have you here!

Supplies
Vinyl
Acrylic Paint of your choice
Paint brushes
Scraps of Ribbon
Pencil
Ruler
Blue Tape
Hot Glue Gun with Glue
Staple gun

Steps 1 – 4
- Using a roll of blue tape as your guide, butt the edge of the blue tape up against the edge of the canvas and lightly mark with a pencil. Continue this all the way around the canvas
- Once you have the small marks placed on your canvas connect the marks using a pencil. Do this lightly so that they lead won’t show through your paint.
- Using green paint paint the 1″ edge half way around the canvas. This makes the rhine of the watermelon.
- Using a clean brush, lightly brush a thin layer of water onto the top half of the sign. Next, using the same brush, brush on blue paint making a thin transparent layer.
 Step 5
Paint the center part of your watermelon slice.

Once the pink has dried, paint in random watermelon seeds.

Step 6
Now for the fun part – embellishing your watermelon!
To help hide the face that the green and pink weren’t perfectly straight where they met, I added in a black rick rack painted pattern.
Plus, it’s super cute!

Next, using a paint pen and a ruler, draw a line across the top of the watermelon.
Also, not shown, I added lighter green squiggles to the rhine part of the watermelon for some texture and color!

Step 7
Add the lettering.
I cut out my Welcome letters using my cutting machine, however peel and stick letters from your local craft store would work just fine too.
Or if you want, you could paint them on!

Step 8
Paint your beads.
By far the easiest way to paint beads that I have found is to done a pair of gloves, add about a teaspoon of paint, grab the beads and rub your hands together.
I then place them on a paper towel to lightly remove excess paint and then place them on a BBQ skewer to dry.
Easy, peasy!

Once the beads have dried, string them together onto a string long enough to place large knots on both ends.

Staple the ends of your string of beads to the back of the canvas.
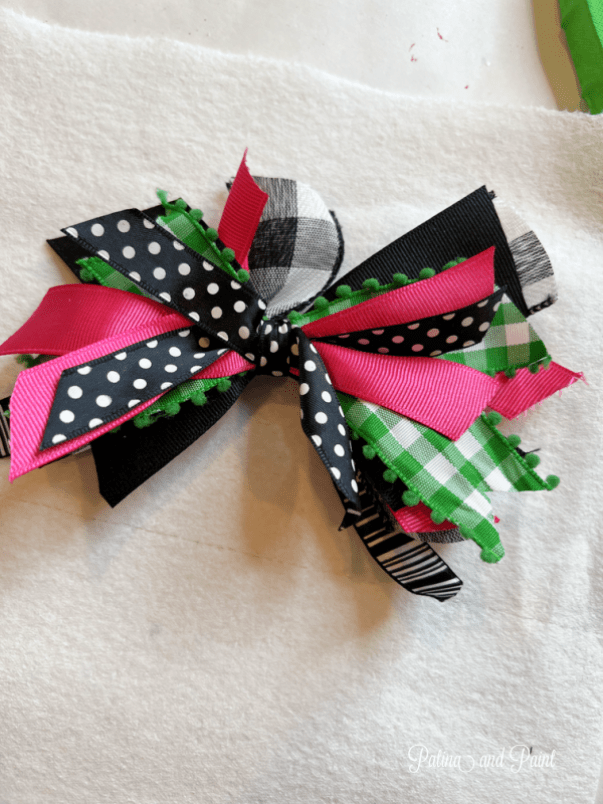
Hot glue a cute bow to the center of the canvas and your Watermelon Summer Sign is finished.
One last thing, I decided that the top was a little too plain, so I went back and added a pink rick rack pattern to the top just like I did on the bottom!
Please join me in hopping over to Nikki’s to see how her craft turned out!
Until next time….
Tammy

Pin It For Inspiration!
I would love to paint like you Tammy. I love your watermelon sign, it is adorable. Thanks for sharing.
What a huge compliment! Thanks Terrie!
This is adorable Tammy! Great tutorial too, I love the rick rack details and how you did your bow, too cute!!
Thanks Jenna!
Tammy, what a darling sign and I love the pink watermelon and sweet details! Blessings, Cecilia @My Thrift Store Addiction
Thank You Cecilia!
Your watermelon sign is so cheerful and adorable, Tammy! Love the colors and embellishments! It certainly is a fun alternative to a regular door wreath!
Thank you Gail!
Such a precious little sign! Your bead painting technique is definitely one I am stealing! Such a good idea!
I love the bright, cheerful colors of your sign, Tammy. Summer and watermelon just go hand-in-hand and I’m sure your guests smile when they arrive at your door!
Thanks Ann!
Tammy, what a cute DIY project for summer. This is a great way to use a round piece of wood and paint. Love your idea for painting beads!
I wish I could say that the bead idea was mine, but I saw Terrie at Decorate With Tip and More do it awhile back and it’s a game changer!
I absolutely love this watermelon sign! And am for sure borrowing your bead painting technique–genius!
The bead painting is a game changer for sure!